


Player Build Guide
The complete guide to eFootball mechanics: attributes, skills, form, and condition.
🎯 1. Introduction & The "Player ID" Myth
The data in this guide comes from extensive testing based on analysis of players' physical models and their impact on in-game performance.
❌ Myth: Player ID determines a player's quality
Claims like "his finishing is better because of his Player ID" or "Player ID makes him press more" are pure myths. The one exception is Manuel Neuer's unique positioning when coming off his line.
✅ Reality: what actually makes a player good
- •Physical model — Height, leg/arm length (reach)
- •Animations — Unique movements and playing styles
- •Attributes (Stats) — Shooting, passing, dribbling, etc.
- •Skills — Special abilities that change the physics of the game
Real-world example:
Players like Patrick Vieira, Peter Schmeichel, and Thibaut Courtois have a huge edge over smaller players with the same stats thanks to their monstrous leg and arm reach — not some mysterious code.
💫 2. Form & Condition Mechanics
The chance of getting a particular condition arrow (Condition A to E) before a match depends on the player's form (Unwavering, Standard, Inconsistent) and their current Live Update rating (A to E).
💡 Note on Epic cards (Form B):
Epic cards always have a B rating. If an Epic card has Unwavering form, it has a 10.0% chance of a Top arrow, 53.6% for a Good arrow, and 36.4% for a Normal arrow — it never gets a bad condition.
| Form Type | Live Rating | ⬆ TOP | ↑ GOOD | → NORMAL | ↓ BAD | ⬇ AWFUL |
|---|---|---|---|---|---|---|
| Unwavering Consistent | A | 14.8% | 23.6% | 61.6% | 0.0% | 0.0% |
| B | 10.0% | 53.6% | 36.4% | 0.0% | 0.0% | |
| C | 60.4% | 3.6% | 32.0% | 3.2% | 0.8% | |
| D | 14.8% | 70.8% | 0.0% | 10.8% | 3.6% | |
| E | 73.2% | 0.0% | 0.0% | 16.0% | 10.8% | |
| Standard Balanced | A | 41.6% | 24.4% | 0.0% | 34.0% | 0.0% |
| B | 50.0% | 31.2% | 18.8% | 0.0% | 0.0% | |
| C | 24.4% | 4.8% | 51.2% | 18.0% | 1.6% | |
| D | 58.4% | 0.0% | 16.0% | 15.6% | 10.0% | |
| E | 44.4% | 14.4% | 0.0% | 20.8% | 20.4% | |
| Inconsistent Erratic | A | 19.3% | 46.5% | 0.0% | 34.2% | 0.0% |
| B | 49.9% | 18.6% | 0.0% | 31.5% | 0.0% | |
| C | 6.8% | 14.8% | 32.4% | 28.4% | 17.6% | |
| D | 26.4% | 13.6% | 12.4% | 21.2% | 26.4% | |
| E | 15.6% | 5.2% | 22.4% | 30.0% | 26.8% |
📈 Condition Arrow Effects Overview (Condition Multipliers)
The specific condition arrow a player gets before a match (see the table above) directly changes their in-game attributes according to the key below.
| Arrow | Form | Effect on attributes |
|---|---|---|
| ⬆️ | TOP | +12% to +12.5% |
| ↗️ | GOOD | +6% to +6.25% |
| ➡️ | NORMAL | 0% (100% base attributes) |
| ↘️ | BAD | -6% to -6.25% |
| ⬇️ | AWFUL | -12% to -12.5% |
🃏 3. Player Card Types
eFootball offers several kinds of cards that differ in stats, how customizable they are, and how you get them. Before you start building, it's worth knowing which card type you're working with — some of them can't be modified at all.
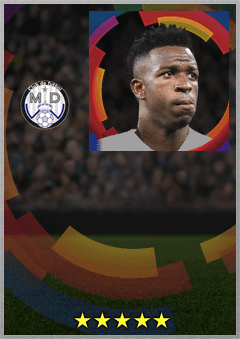
Standard Player Cards
The base edition of players in their regular form. Fixed stats reflecting real-world performance, with the ability to level them up and adjust their skills over time.
📌 How to get it
- •Standard Player List — buy with GP
- •Standard Player Tickets from events
- •Occasionally given away free in KONAMI campaigns
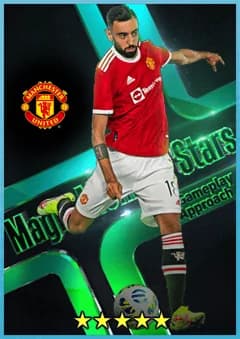
Featured Player Cards
Boosted stats, editable skills, and a distinct look compared to the standard versions. Can be trained and progression points can be allocated freely.
📌 How to get it
- •Club campaigns
- •Premium packs (Player Packs)
- •Chance Deals during events
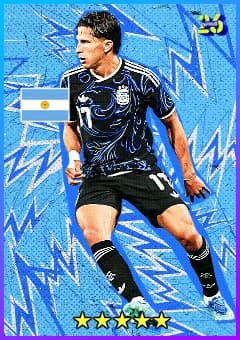
Highlight Player Cards
Functionally very similar to Featured cards, and they show up in-game quite often.
📌 How to get it
- •Regular events and campaigns
- •Nominating Contracts (pick a specific player)
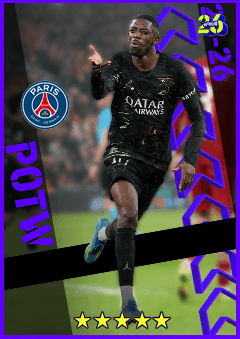
Trending Player Cards (POTW)
Mainly POTW (Player of the Week) cards and cards from special events. Unlike Featured cards, they can't be trained, have their position changed, or have skills added.
📌 How to get it
- •A new POTW pick every Thursday
- •Free Chance Deal after completing an Event
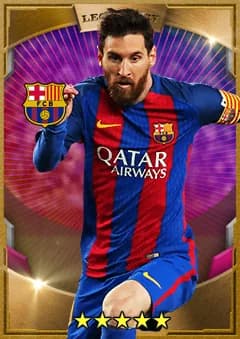
Legendary Player Cards
Cards known from older PES generations (Legends / Iconic Players), with a dark gold or pink background. Overshadowed by Epic cards today, but still top-tier quality.
📌 How to get it
- •Previously very rare
- •No longer obtainable today unless Konami changes that
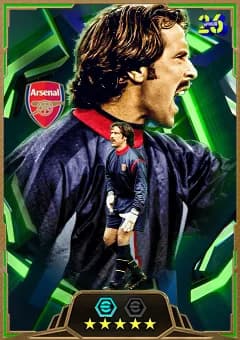
Epic Player Cards
Capture legendary and active players during a specific successful stretch of their career. Stats reflect the player's overall impact during that era.
📌 How to get it
- •Premium packs (usually a 150-player box)
- •Free attempts during special events
- •Various campaigns (treasure links, Legends Assemble, etc.)
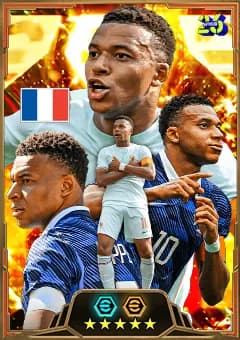
Big Time Player Cards
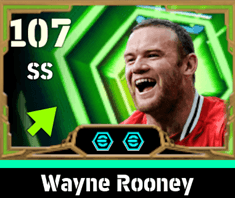
Unlike Epic cards, these focus on one specific match where the player delivered a career-defining performance — often with the exact match date shown. Even higher stats than Epic cards.
📌 How to get it
- •Premium packs (usually a 150-250 player box)
- •Konami sometimes gives away older Big Time cards for free during campaigns
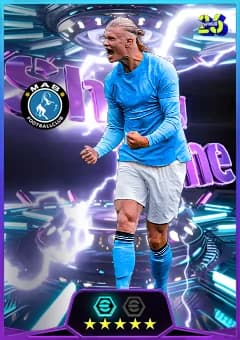
Show Time Player Cards
A premium subset of Highlight cards. Very high stats and unique special skills. Unlike Legend and Epic cards, their weekly condition depends on the footballer's current real-world performances.
📌 How to get it
- •Premium packs (usually a 150-player box)
- •Rewards for ranking in PvP divisions
- •Campaigns and special in-game events
📊 4. How Attributes (Stats) Actually Work
Every attribute has a specific effect on game mechanics. It's not linear — some combinations amplify the effect of other attributes.
🎯 Shooting & Passing
Accuracy of normal and Stunning shots
Depends exclusively on Finishing
Accuracy of technical shots (Controlled/Curl)
Affected by a combination of Finishing + Curl
Shot speed
Depends on Kicking Power, not on Finishing!
Pass accuracy
Affected by Low Pass / Lofted Pass. Curl has no effect on regular passes.
Pass speed
Depends purely on Low/Lofted Pass, not on Kicking Power!
Crosses
Accuracy: Lofted Pass + Curl, speed: Lofted Pass
💪 Physical Contact & Heading
Shielding
Depends exclusively on Physical Contact
Recovering balance after a duel
Depends on Balance
Heading accuracy
Affected by the Heading stat
Formula for maximum jump height:
Jump Height = Height + 56 + [(Jump - 40) × 0.6] cm
Every 1 point in the Jump attribute adds roughly 0.6 cm to jump height
⚽ Dribbling, Speed & Acceleration
First touch & tricks
Depends on Ball Control
Max speed with the ball
Dribbling + Speed
Max speed without the ball
Purely Speed
Acceleration with the ball
Dribbling + Leg Length (the Acceleration attribute has no effect at all with the ball at the player's feet!)
Acceleration without the ball
Acceleration + Leg Length
Definition of Acceleration: The first 10 meters of a sprint from a standing start
Ideal height for dribbling: 166 cm to 173 cm
🛡️ Defending & Goalkeepers
Tackling
Determines the accuracy and tendency to win the ball
Defensive Awareness
Affects AI defending, how tightly a player marks an opponent, and — according to more recent meta analysis — reaction acceleration while marking.
⚡ Update: Acceleration in the Marking State
How it works
When a player is in a "marking state" (tracking an opponent with the ball or a potential pass target) and has to react to their sudden sprint, Defensive Awareness affects their initial acceleration. The effect on acceleration is roughly half that of the regular Acceleration attribute.
Cap: 70
This bonus to reaction acceleration only kicks in below a value of 70. Once a player's Defensive Awareness reaches 70 or higher, further increases no longer speed up their initial acceleration in this specific scenario.
Practical impact
For center-backs (CB) this isn't a revolution — they typically already have Defensive Awareness well above 70, so their positioning doesn't fundamentally change. The change mainly separates the performance of forwards/midfielders (low defending, often below 70) from defensive players — a forward or attacking midfielder with low defending will react noticeably slower than a classic defensive player when trying to track an opponent's run.
⚠️ Important warning
This doesn't mean defenders only need Defensive Awareness of 70! A higher value still improves a defender's overall intelligence, positioning, reactions, and decision-making speed. Newer versions of the game engine have also generally increased the importance of all four defensive stats.
Defensive Engagement
AI reaction when intercepting passes and blocking
Goalkeepers (GK):
GK Reflexes & Model — Key for saving close-range shots
GK Reach & Model — Key for maximum reach on shots
⚠️ Jump for goalkeepers — Has NO effect on saving regular shots! It only helps with lobs and high crosses.
⚠️ Stamina Debuff (Low Stamina)
Between 100% and 50% stamina, a player performs at 100%. Once stamina drops below 50%, all attributes (except Place Kicking, Speed, and Stamina) start dropping linearly!
At the red indicator (15% stamina), the drop reaches a maximum of -20% (e.g. a stat of 99 drops to 80).
❌ Myth busted: Low stamina does NOT reduce a player's running speed (Speed)!
🎚️ 5. Stats Thresholds (Builds & Threshold Values)
If you want to get the most out of your players and not waste precious Progression Points, stick to the following rules based on position and traits.
⚠️ Important disclaimer
KONAMI doesn't officially publish the exact mathematical formulas or specific attribute thresholds. The following guide is based on long-term community testing, analysis from the in-game editor, and the experience of top players. It serves as a proven practical guide for optimizing builds, not as an official manual from KONAMI.
⚽ 1. Forwards (CF / SS) — Scoring goals and making runs
Offensive Awareness
Target: 90 (absolute minimum for a striker), ideally 95+.
Effect: A higher value significantly improves the timing of runs behind the defense and reactions to loose balls off the post or goalkeeper.
Finishing
Target: 90 (for players with Phenomenal Finishing or Long Range Curler), 95 (for regular strikers).
Effect: After recent changes to the game system, the ball finds the corners of the goal much more precisely at 95+.
Physical Contact
Target: 75 (for fast, agile wingers/forwards) | 85+ (for powerful strikers).
Effect: The 75 threshold ensures a player doesn't immediately get knocked off the ball in a duel; 85+ turns them into a "tank" that can hold defenders off with their back to goal.
🎭 2. Midfielders & Wingers (AMF / CMF / Winger) — Dribbling and playmaking
Tight Possession
Target: 86 (the first major milestone) up to 90.
Effect: At 86, turning with the ball on the spot noticeably speeds up. A value of 90 unlocks the smoothest feint animations under pressure.
Rule: The cap is 99. Putting points beyond 99 has no real benefit.
Kicking Power
Target: 90 or 95+.
Effect: Values between 91-94 bring a minimal difference over 90. If you're investing in power, aim straight for 95+.
Watch out for Blitz Curl: If the player has the Blitz Curl skill, the ideal shot power is around 85-88. Higher power (95+) makes the ball travel too fast and curl less in the air.
🛡️ 3. Center-backs (CB) — Shutting down the opponent's attack
Speed profile (Speed & Acceleration)
Speed: Target 90 — beyond this value, every extra point only gives half the benefit.
Acceleration: Target 80 (center-backs - CB) | 88-90+ (fullbacks - RB/LB).
Reason: Fullbacks need explosiveness over the first few meters, while a CB is fine with 80 as long as they have high top speed and good defending.
Defensive Stats
Target: All key defensive attributes at 90+.
Effect: Defensive Awareness values above 92-93 trigger more frequent automatic blocks and slide tackles without the risk of a foul.
Physical Contact
Target: 88-90.
Effect: Essential for winning physical duels and headers against strong forwards.
🚀 4. Speed — The New 111 Cap (Booster Era)
Until recently, the rule was that beyond Speed 90, any further invested points practically weren't worth it (see the Golden Rule below). But the latest community tests show a different reality: with two stacked +6 Boosters via the manager, Speed can be pushed all the way to 111 — the first time in eFootball's history the previously tested ceiling of 105 has been broken.
And more importantly — according to the measurements, the conversion from the stat to real-world speed (km/h) stays linear even above 100. There's no hidden "plateau" around 96-99, as has long been claimed — the engine still appears to translate every point above the old cap into real on-pitch speed.
Speed Value vs. real speed (km/h) · data from community testing, values are approximate
💡 Key takeaways
- •In a straight sprint without the ball, a few extra km/h isn't something you'll notice at a glance — the difference between players still mainly comes down to Acceleration over the first roughly 15 meters, where most battles for the ball are decided.
- •According to tests, the engine can render speed up to Speed 111 (theoretically even 112 with the Manager Boost, which can't be edited yet).
- •This is an unofficial community test (double +6 Booster), not a mechanic guaranteed by KONAMI — treat the numbers as approximate.
✨ 5. Quick Summary of the Golden Rules
- 1.Speed Cap: Once your player reaches 90 Speed, consider investing points elsewhere instead (e.g. acceleration, passing, or defending). The exception is builds with two +6 Boosters — there, the linear benefit stretches all the way to 111, see the Speed section above.
- 2.Dribbling limit: Never build Tight Possession, Ball Control, or Dribbling above 99. Points beyond that cap are wasted.
- 3.Player ID has the final say: A player's height, weight, and body model make a huge difference. A tall player with 80 acceleration will feel different from a small player with the same value. A tall player also doesn't need as extreme Physical Contact as a small one.
⚡ 6. Detailed Explanation of Player Skills
You'll find a detailed description of every skill in the catalog
We maintain a complete overview of every skill directly in the database — with images, video examples, and stat effects for each skill, so it's always up to date.
🧭 7. Attribute Priority by Position
Before you start allocating points when building a player, it's worth knowing which stat modules (groups of attributes) carry the most weight for a given position. The order below comes from testing and reflects general importance — it's an approximate priority ranking, not an exact point distribution for a specific card. That always depends on the player's physical model and starting stats too.
📋 What's included in each attribute group?
🎯 Shooting
Finishing • Place Kicking • Curl
🎯 Passing
Low Pass • Lofted Pass
⚽ Dribbling
Ball Control • Dribbling • Tight Possession
⚡ Dexterity
Offensive Awareness • Acceleration • Balance
🏃 Lower Body Strength
Speed • Kicking Power • Stamina
💪 Aerial Strength
Heading • Jump • Physical Contact
🛡️ Defending
Defensive Awareness • Defensive Engagement • Tackling • Aggression
🧤 GK 1
Goalkeeping • Jump
🧤 GK 2
GK Parrying • GK Reach
🧤 GK 3
GK Catching • GK Reflexes
⚽ Forwards / Wingers
CF, SS, LWF, RWF
1.Lower Body Strength
2.Dexterity
3.Dribbling
4.Shooting
5.Aerial
6.Passing
🎭 Central midfielders
AMF / CMF
1.Lower Body Strength
2.Dexterity
3.Defending
4.Dribbling
5.Passing
🛡️ Defensive midfielders
DMF
1.Defending
2.Lower Body Strength
3.Aerial
4.Dexterity / Passing (tied)
🔴 Fullbacks — attacking style
L/RMF, L/RB for attack
1.Lower Body Strength
2.Dexterity
3.Dribbling / Passing / Shooting (tied)
4.Aerial
🔵 Fullbacks — defensive style
L/RB for defense
1.Lower Body Strength
2.Defending / Dexterity (tied)
3.Aerial
4.Passing / Dribbling (tied)
⬜ Center-backs
CB
1.Defending
2.Lower Body Strength / Aerial (tied)
3.Dexterity
🧤 Goalkeepers
GK
1.GK1 — Catching / Parrying
2.GK2 — Reflexes
3.GK3 — Reach
4.Aerial (only if points remain)
🎯 8. Recommended Skills by Position
Every position has its key skills (must-have) and useful extra skills. Check out the ones for your role below.
⚽ Forwards (CF / SS)
🔥 Must-Have:
💡 Nice-to-have:
🪶 Wingers (LWF / RWF)
🔥 Must-Have:
💡 Nice-to-have:
🎭 Central Midfielders (AMF / CMF)
🔥 Must-Have:
💡 Nice-to-have:
🛡️ Defensive Midfielders (DMF)
🔥 Must-Have:
💡 Nice-to-have:
🔴 Fullbacks (LB / RB)
🔥 Must-Have:
💡 Nice-to-have:
⬜ Center-backs (CB)
🔥 Must-Have:
💡 Nice-to-have:
🧤 Goalkeepers (GK)
🔥 Must-Have:
💡 Nice-to-have:
📘 This guide is based on extensive testing and analytical data on eFootball mechanics.